
The JTECH-VW02 supports a 2x2 video wall configuration, and with the purchase of additional units, the multi-level cascading function allows for up to 10x10 video wall
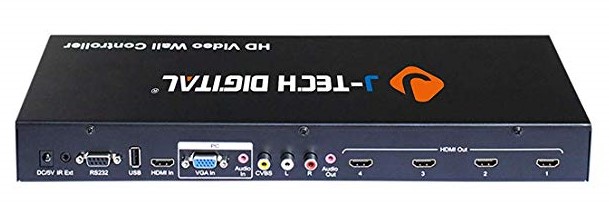
Default Settings for the Display Arrangements Is as Follows:
- HDMI Output 1 = Top Left
- HDMI Output 2 = Top Right
- HDMI Output 3 = Bottom Left
- HDMI Output 4 = Bottom Right
Applications:
One Source to 4 Displays: Splits a Single Source to 4 Connected Displays
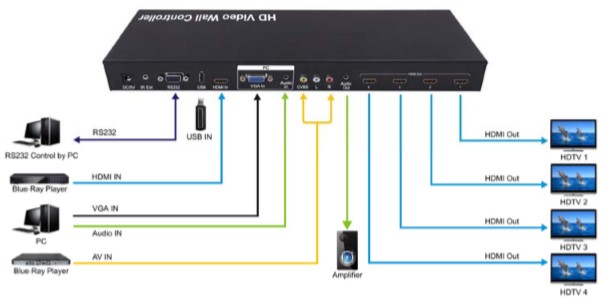
- Connect a source device (USB, HDMI, VGA, CVBS)
- Connect the displays to the HDMI output ports
- Press "1", "2", "3", "4" on the remote. The indicators for those outputs will turn green on the front panel of the unit
- Press the "Home" button on the remote. Select the "Splicing Setup" option, and verify that "Splicing SW" is turned "Off" for all displays
- This will split the signal from the source and feed it to each display individually
2x2 Video Wall Display: Construct One Image Across 4 Displays
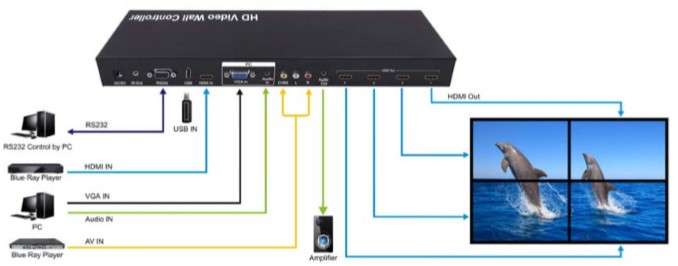
- Connect a source device (USB, HDMI, VGA, CVBS)
- Connect the displays to the HDMI output ports
- Press "1", "2", "3", "4" on the remote. The indicators for those outputs will turn green on the front panel of the unit
- Set the "Horizontal Count" and "Vertical Count" to 2
- Press the "Home" button on the remote. Select the "Splicing Setup" option, and verify that "Splicing SW" is turned "On" for all displays
- This will create a 2x2 video wall, constructing one image across all 4 displays
Multi-Level Cascading: Connect Multiple Video Wall Controllers Together to Create a 3x3, 4x4...10x10 (Max)
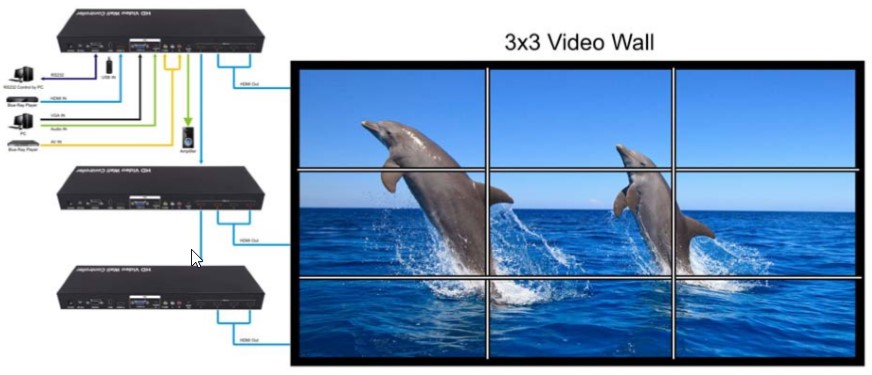
For multi-level cascading, the HDMI output on the first unit plugged in to the next video wall controller should be set as 1x1, and the rest of the outputs should be set as desired
For a 3x3 video wall:
- Connect the HDMI 1 output port to the HDMI input port of the cascading unit
- Toggle the settings for HDMI 1 output port on the first unit, and set the "Horizontal Count" and "Vertical Count" to 1
- Toggle the settings for HDMI 2-4 outputs, and set the "Horizontal Count" and "Vertical Count" to 3
- Verify that "Splicing SW" is turned "On" for all displays
This will create a 3x3 video wall. Repeat the steps from the cascading video wall controller to create a NxN video wall (10x10 Max)
Creating a Custom Scroll Text:
- Create a text document, and name the file "ARICH.TXT". Proceed to enter the desired text in the document
- Save the document on a USB flash drive, and insert the flash drive in the video wall controller
- Press the "ALL" button on the remote till the ALL indicator on the front panel lights up green. If using the DIP switch, set the panel to "010000"
- Press "Home" on the remote, and locate the "Scroll Text" setting in the Advanced menu
- In the "Scroll Text" menu, set the "Function Switch" option to "On". Within the same menu, users can also adjust the settings for their custom text
- Restart the video wall controller, and the text will appear on the display
Panel Information:
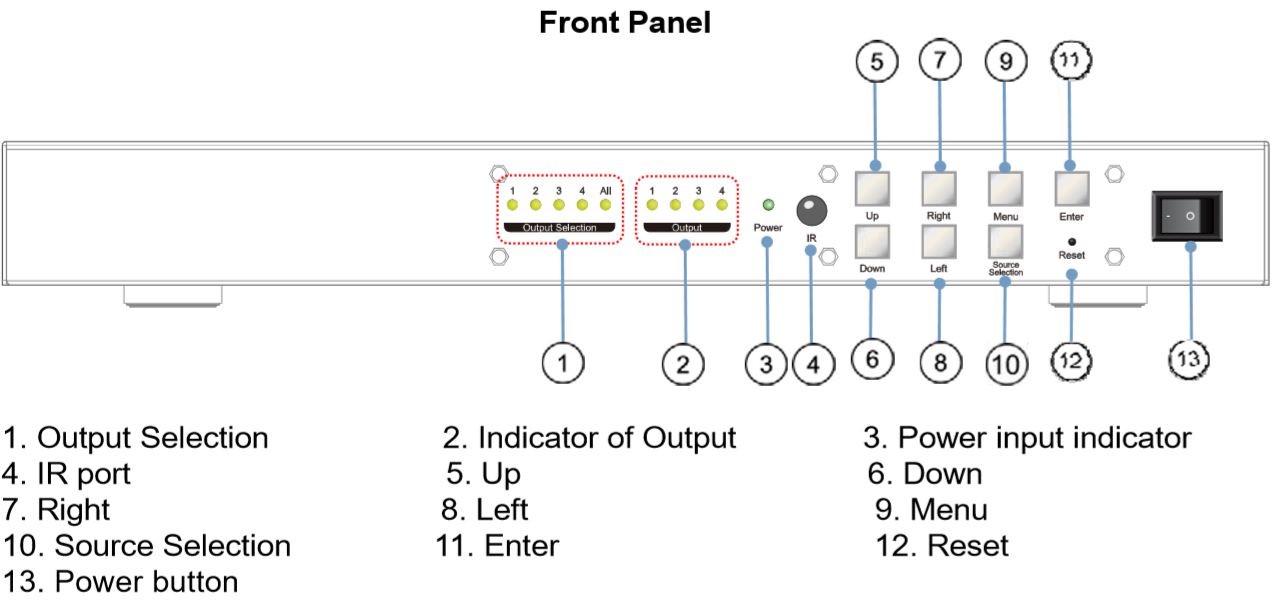
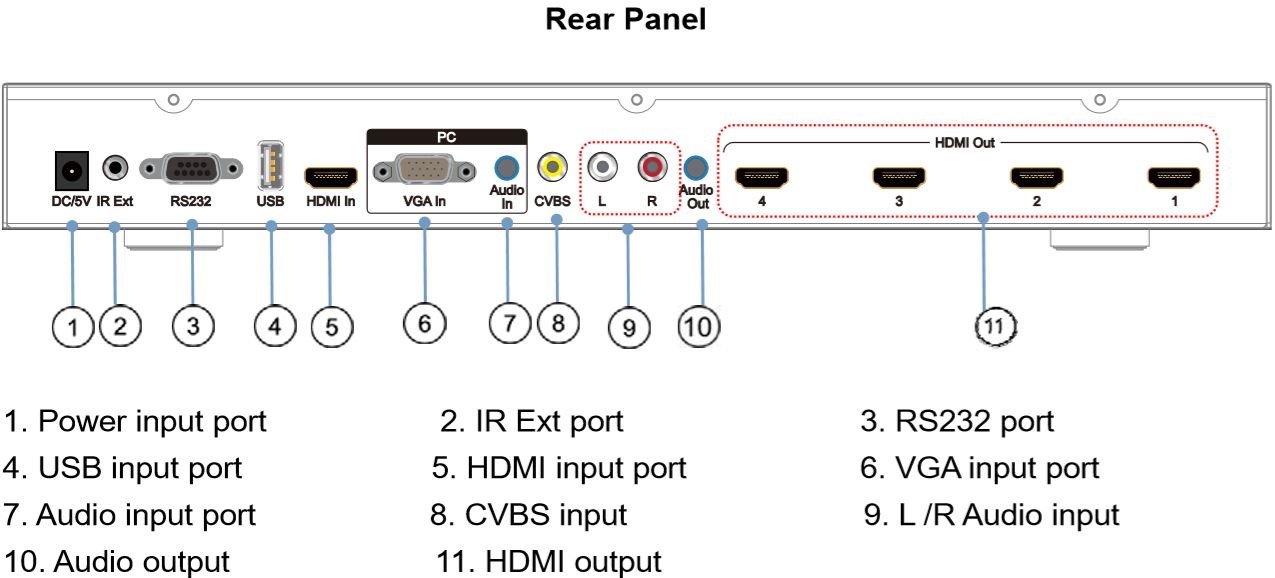
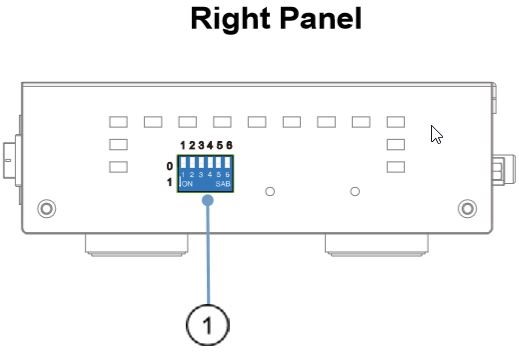
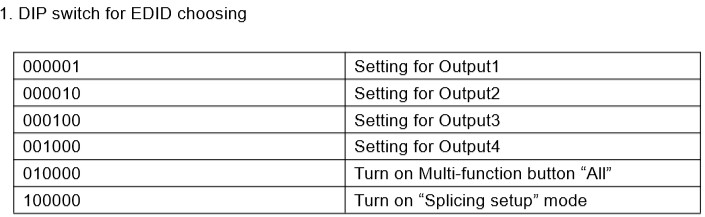
Controlling the Unit:
- Remote Control
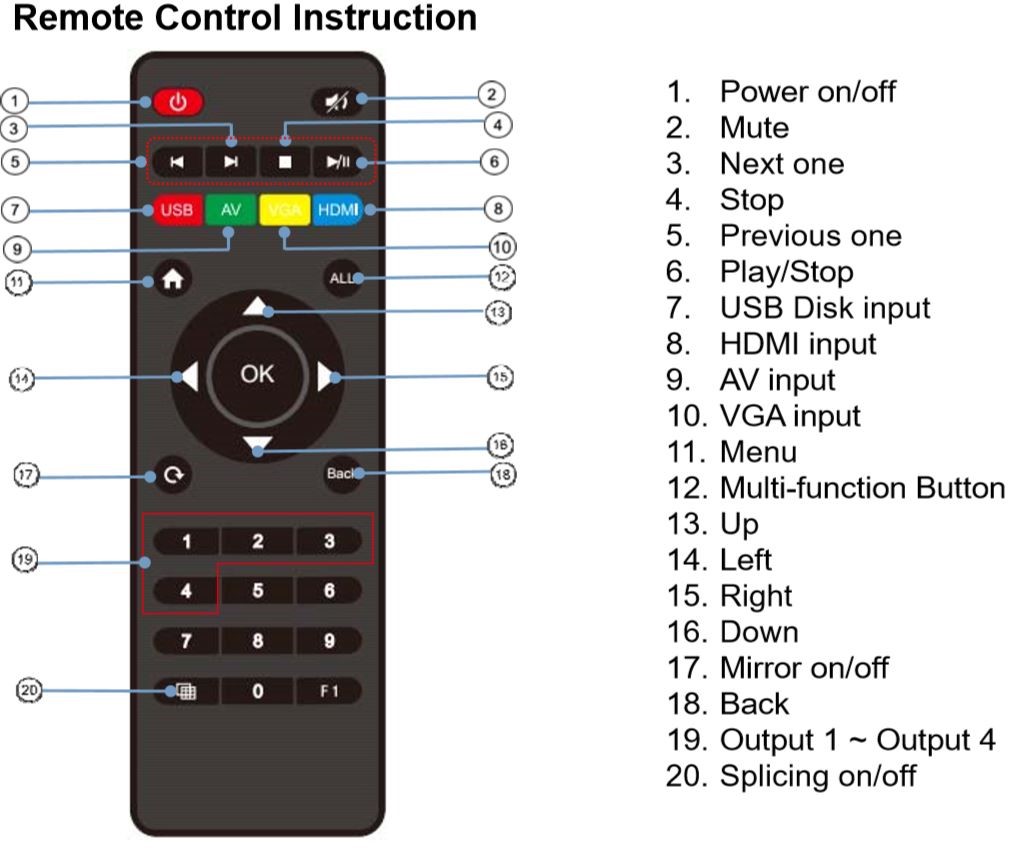
- RS232 Commands:
Using the RS232 - RS232 or a RS232 - USB cable, users are able to connect the video wall controller to a PC. This function allows the users to control the unit via entering specific commands in the provided PC software. To utilize this function:
- Download the software from the included CD
- Connect the unit to the PC using a RS232 - RS232 or a RS232 - USB cable
- Open "CommUart Assistant". The file will be located where the software was installed
- Under COM settings, set the following:
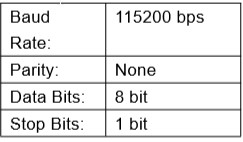
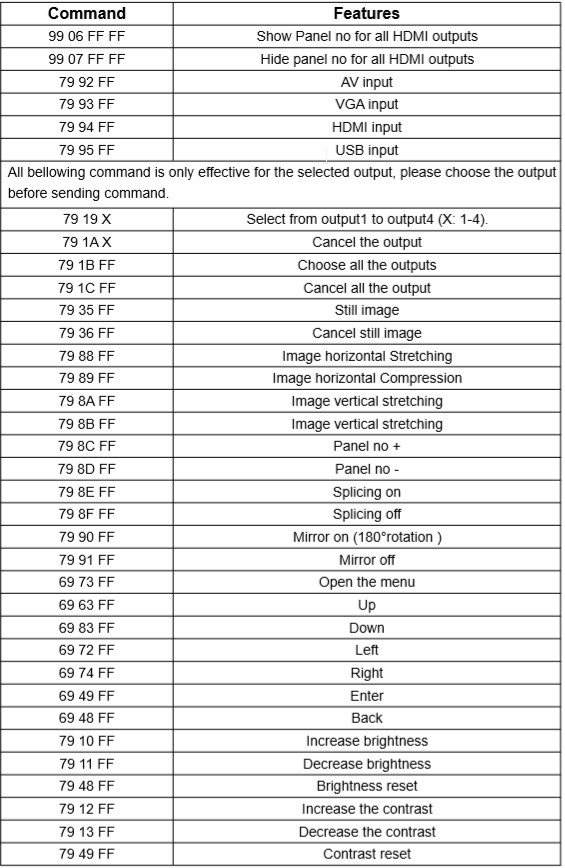
- Enter desired Port Commands in the blank field next to "Send Options" field, and press "Send"
- Following is the command list that the users can utilize:
J-Tech Digital Support Team
support@jtechdigital.com
1-888-610-2818
Comments
0 comments
Please sign in to leave a comment.